
Want context-sensitive text to appear on the Function bar? Need to fit more than three characters per function key? I’ll show you how to create dynamic function key labels for C-more Micro operator panels in this article.
The Function object labels and configures the function keys and LEDs on C-more Micro operator panels. The descriptive text that appears on the screen for each key in the Function object is user-definable, but this text is static and limited to three characters. This article describes the method I’ve used to implement a dynamic Function object; one that displays up to four characters per key and can change the text displayed based on conditions. Some may call it a hack, but I prefer the term “inelegant”.
There are two critical parts to making a dynamic function key object:
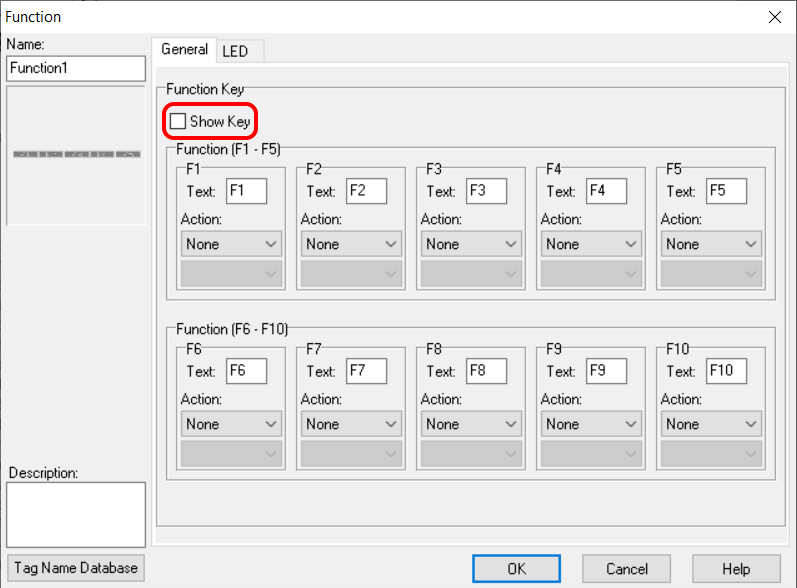
- Uncheck the Show Key checkbox on the Function dialog. This is, please forgive me, key because even if you move the Function object off-screen, it will still appear in its normal position, over the top of any other objects in that space.
- Insert your own text objects in place of the Function object.
Insert the Function object
- In the C-more Micro software, create or open a project.
- Create a new screen if necessary (creating a new project will also create a screen).
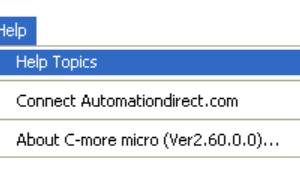
- Select Object > System > Function from the pull-down menus.
- Place the Function object by clicking in the editing window. You’re given a crosshair and I think the intent is to draw a rectangle, but the size, proportions, and location don’t matter. So you can just click and release. The Function object will appear with its default size and position.
- On the resulting Function dialog, clear the Show Key checkbox then click OK.
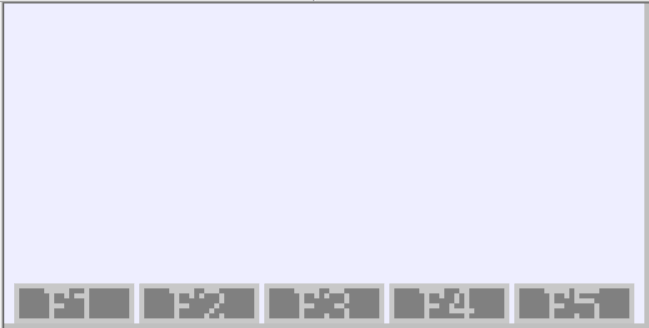
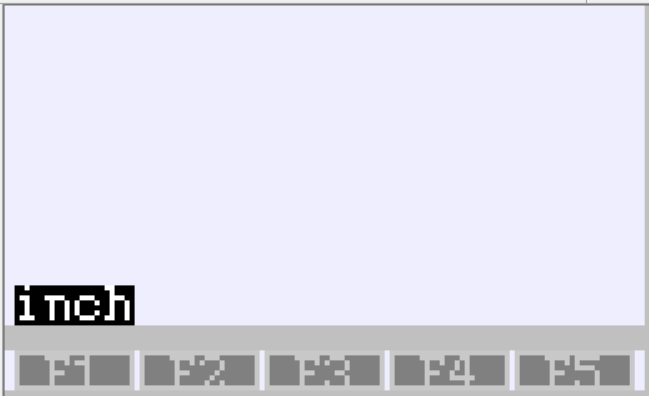
Note that the Function object still appears on the editing window but is grayed out.
Use the Function object as a template to create your own labels
- Select Object > Text > Static Text from the pull-down menus and draw the text box over one of the label boxes of the Function object.
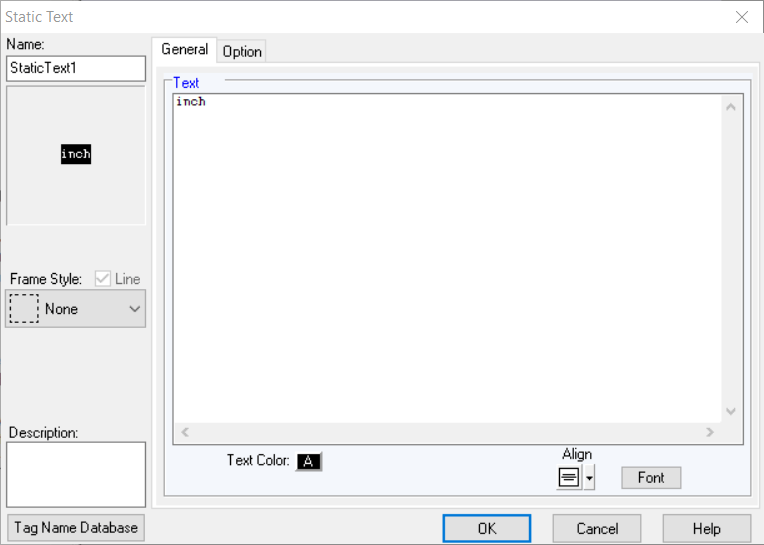
- On the resulting Static Text dialog, change the Frame Style to None.
- Enter “inch” (without quotation marks) into the Text pane.
- Click the Text Color button and select Inverse.
- Click OK, and adjust the size and position of the Static Text object as necessary by dragging its handles. Note that the Function object completely obscures the Static Text object when perfectly aligned.
- Move the Function object off the screen by selecting it and using the down arrow on your keyboard instead of dragging it. This maintains the horizontal alignment so it’s easier to line up subsequent labels.
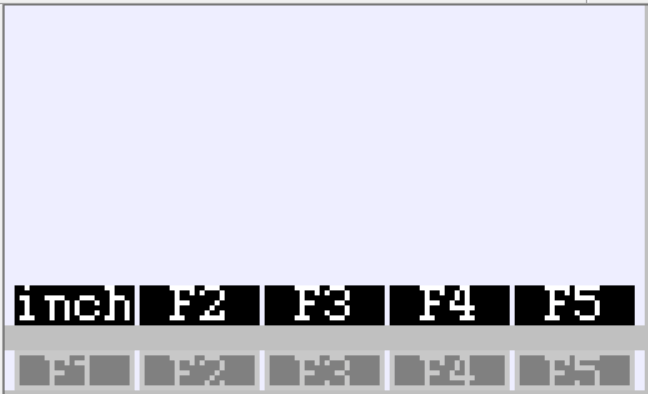
- (Optional) Copy and paste the Static Text object to create the labels for the remaining function keys. To do this, select the Static Text object and press CTRL+C and CTRL+V or select Edit > Copy/Paste. Reposition and edit the copies as necessary. It’s probably a good idea to give the objects meaningful names, like “F1 text” or “F1 inch”, on the Static Text dialog.
If all you wanted was to break free of the three-character limit, you’re done!
Make that function key label dynamic!
Continuing the example, let’s make the function key label display “inch” or “mm” depending on the state of a mode. We will have two labels with different text, but only one will display at a time.
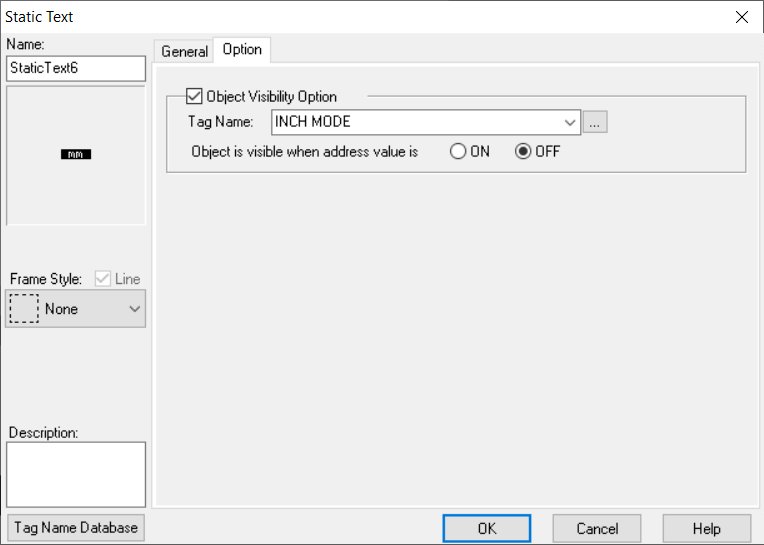
- Double-click the original “inch” Static Text object created in the steps above.
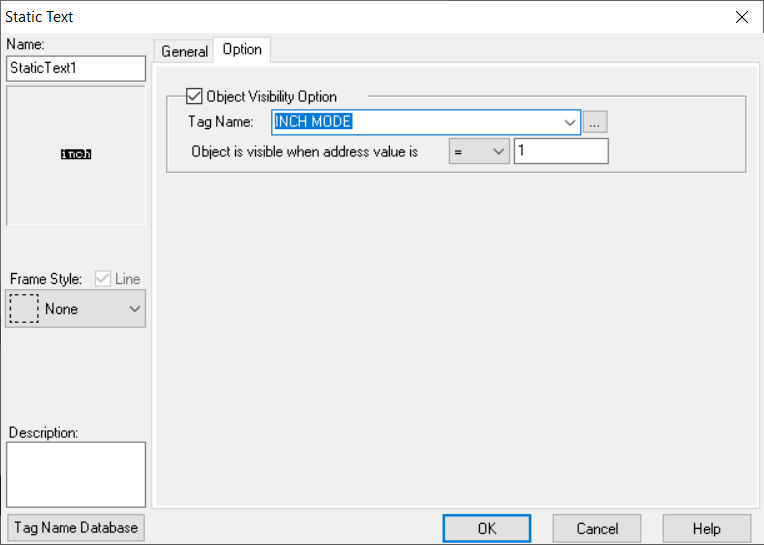
- On the resulting Static Text dialog, select the Option tab.
- Set the Object Visibility Option checkbox. Enter INCH MODE for the Tag Name and press Enter.
- On the resulting Tag Name – Add dialog, change Device Name to <INTERNAL>, Tag Data Type to Discrete, then click Add. The Device Name is set to <INTERNAL> (to the HMI) for the purposes of this example only. See the Conclusion section for more information.
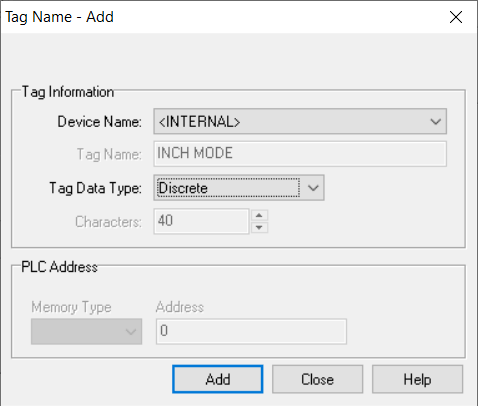
- Click OK.
- Copy and paste the original “inch” Static Text object. It’s your friends CTRL+C and CTRL+V again!
- Move the copy so it is directly over and aligned with the original. The arrow keys on your keyboard can be handy for precisely moving selected objects.
- Double-click the copy and change the text in the Text pane from “inch” to “mm” (without quotation marks).
- Go to the Option tab and turn “Object is visible when address value is” to OFF.
- Click OK.
- Save the program.
Simulate
Let’s test the dynamicality dynamicness dynamicosity functionality of our dynamic function key label.
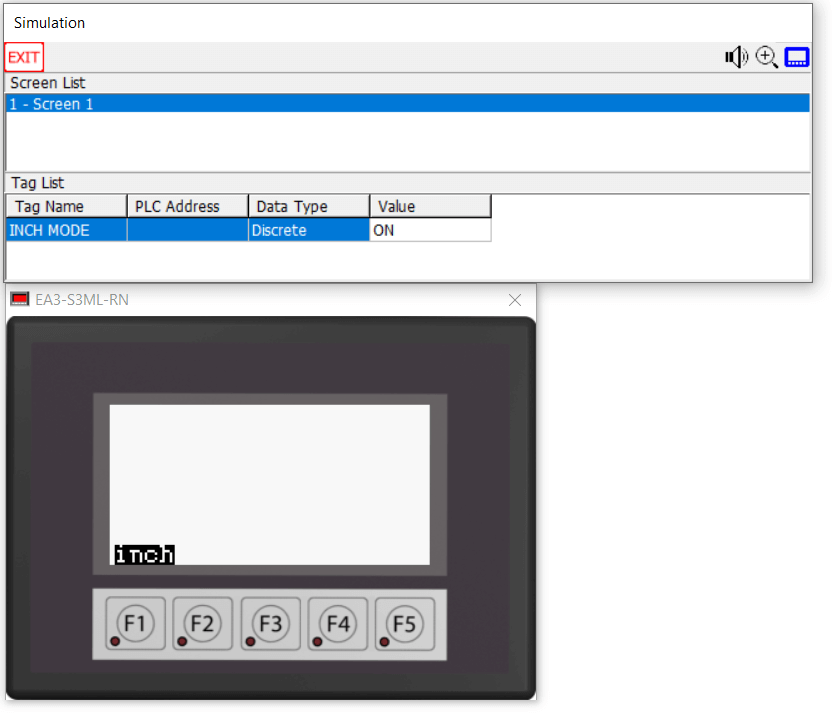
- Click the Simulate Project button on the toolbar. The software will compile the program and then open the Simulation dialog and a simulated screen.
- Note that the “mm” label is visible on the simulated screen.
- On the Simulation dialog, double-click the OFF text in the Value column for the INCH MODE row to change it to ON. Note that the label on the simulated screen now changes to “inch”. Double-click the cell in the Value column a few times to watch the label change back and forth.
Conclusion
In reality, the INCH MODE tag in the HMI would not point to <INTERNAL> for the device. It would need to point to the PLC device (typically DEV001) and a discrete PLC address. There would be PLC logic that toggles INCH MODE on and off when the function key is pressed (*cough* flip-flop logic *cough*).
Other Possibilities
The possibilities this technique unlocks are endless! Okay, probably not, but here are some ideas I may be trying in the future.
- Function key labels that change color. For example, the color is normal for “mm” and inverse for “inch”.
- Function key label text that flashes or scrolls. The Scroll Text object scrolls too slowly for my tastes, however, so you may want to use a Dynamic Text object and have the PLC control the scrolling.
- Images as function key labels. Perhaps a prettier alternative to Up and Down Arrow Symbols Without ALT Codes.
- Multiple-line labels. There’s nothing that says your text object can’t be tall enough to contain two or more lines of text.
- Function key labels that auto-hide, appearing when triggered and hiding after some inactivity period. The trigger could be a press of any function key, which would be ignored except to reveal the labels.
CTRLfreak.io is not affiliated with AutomationDirect, maker of C-more Micro operator panels.