
In this article, I’ll show you how to make your own buttons that change the grid spacing for the grid snap functionality in AutoCAD Electrical, or any AutoCAD-based product. Grid spacing is sometimes referred to as grid size.
Yes, it is 2022 and AutoCAD Electrical has no out-of-the-box buttons for quickly changing grid snap spacing. After working with promis.e for many years, I was surprised to discover this shortcoming as an ACADE newbie. It is recommended to draw schematic wires and insert symbols on-grid in AutoCAD Electrical, so why no buttons? So how does one change Grid size in AutoCAD and AutoCAD Electrical? By opening the snap settings dialog and typing in the value, which quickly becomes tiresome. So I searched for a solution. Here’s what I found.
Make a Custom Toolbar
First, I recommend creating your own toolbar for storing custom, customized, and frequently used tools.
- Type CUI at the AutoCAD command prompt and press Enter. This opens the Customize User Interface dialog.
- In the Customizations in All Files pane in the upper left of the Customize User Interface dialog, right-click Toolbars and select New Toolbar from the pop-up.
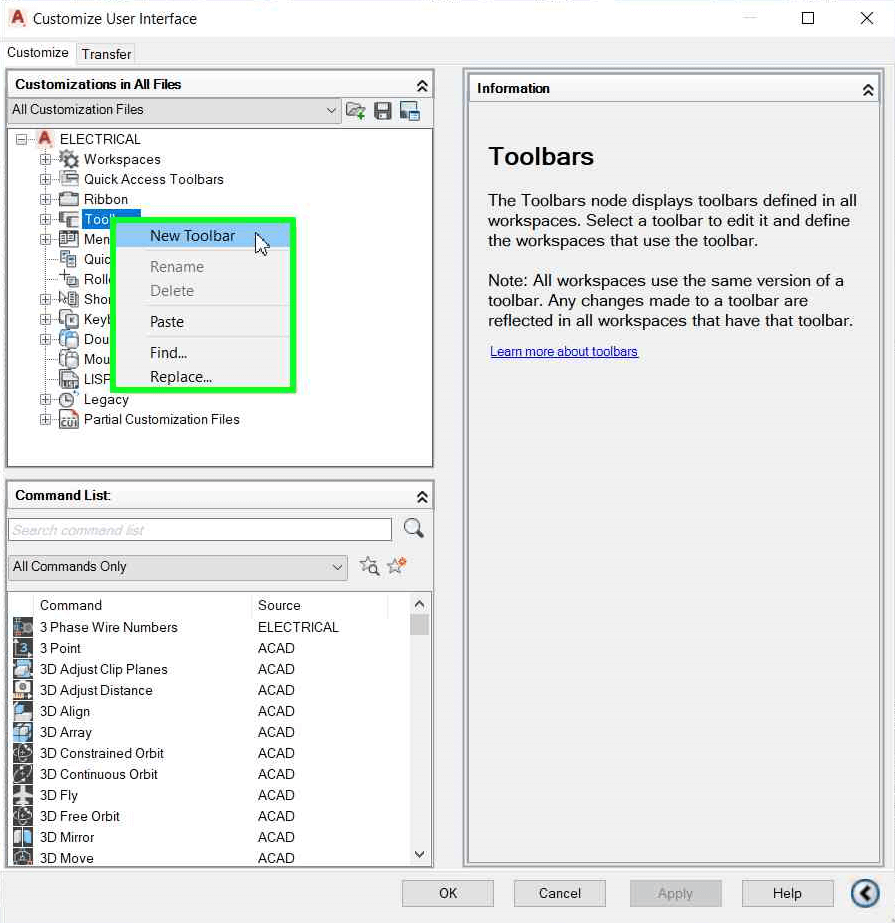
- Name the new toolbar. For this example, we’re naming the new toolbar CUSTOM but you can name it whatever you like.
Create the Grid Spacing Buttons
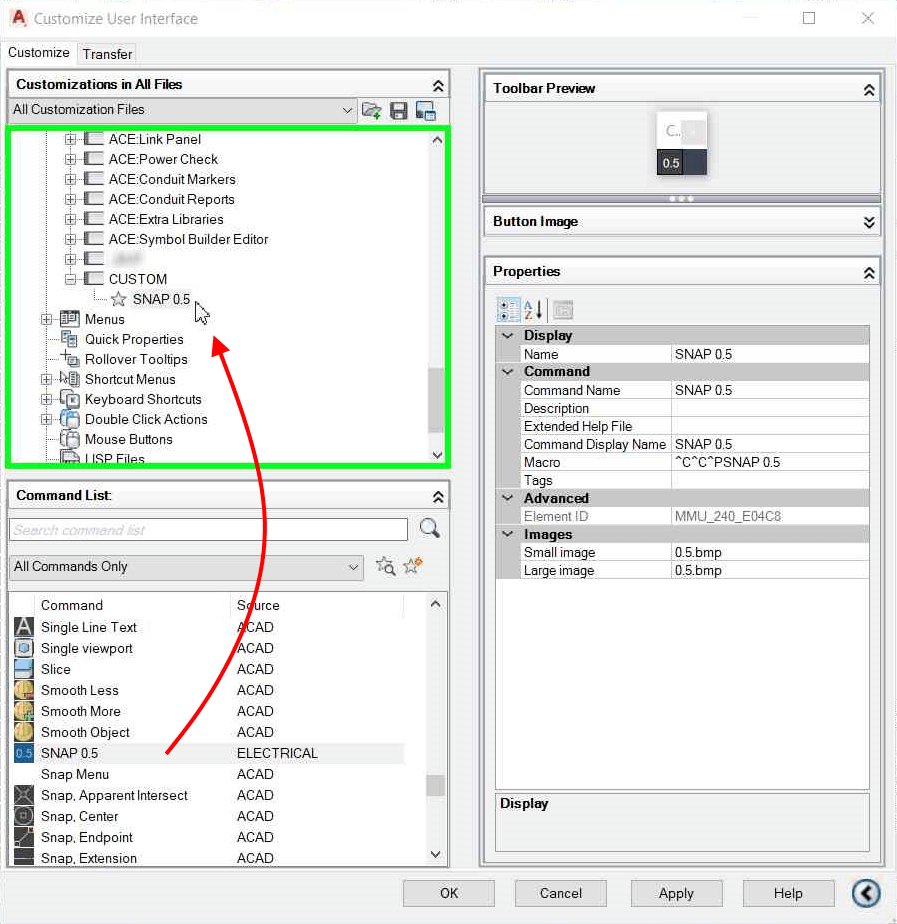
- Right-click a command in the Command List and select New Command from the pop-up.
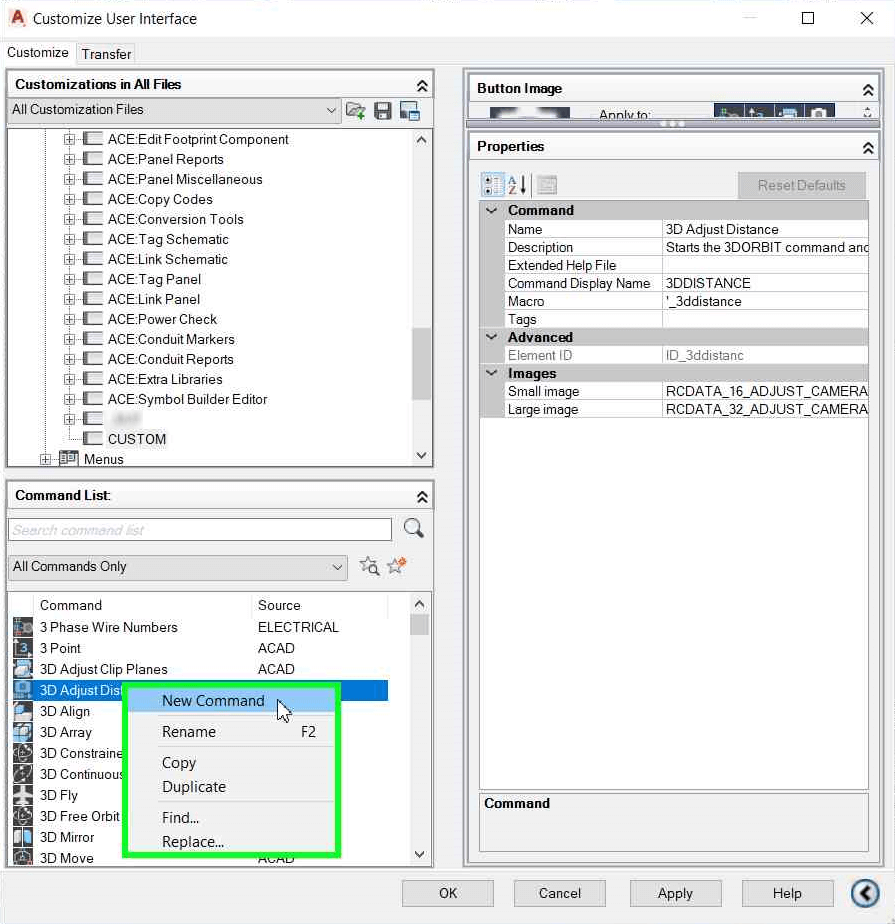
- Name the new command SNAP 0.5.
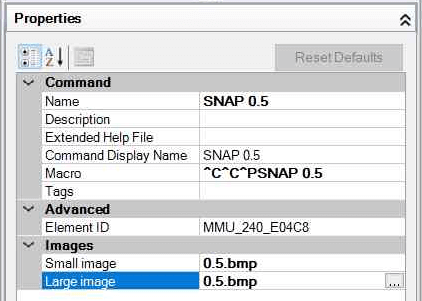
- Set the Macro property of the new command to ^C^C^PSNAP 0.5
- Set Small image and Large image to the desired image file(s). The icon graphics are easy enough to make, but here are the ones I use in case you’re as lazy as I am:


- Drag the new SNAP 0.5 command from the Command List pane into the new CUSTOM toolbar.
- Right-click the SNAP 0.5 command in the CUSTOM toolbar and select Duplicate from the pop-up.
- Rename the duplicate command SNAP 0.25 and set the properties accordingly, namely the macro of ^C^C^PSNAP 0.25
- Click OK on the Customize User Interface dialog to apply the changes and close the dialog. The new toolbar should appear somewhere on your screen.
Repeat steps 6 & 7 to create any other grid snap spacing variations you like.
The finished product:

Congratulations, you know have buttons for quickly changing the grid spacing in AutoCad!
One nice side-effect of using these buttons is that they not only change the grid spacing, but also turn on grid snap. I find this handy for turning the grid snap back on after I use a command that I’ve modified to turn grid snap off, like Trim Wire. Yes, yes, F9 works too, thank you dear reader yelling at your screen.
Power Up Other Tools
Now that you know the macro to change the grid spacing, you can also prepend the macro to other commands. Maybe you always draw wires in a 0.5″ grid but want to insert symbols and draw fields on a 0.125″ grid. Go nuts, you crazy mutha <background singers>shut your mouth!<\background singers>